GIMP redux, squaring the CMYK circle
19 June 2009, 17:14
Before we return to the schmuck, there is going to be a small intermezzo.
indexed
In the future GIMP will lose its indexed mode. As I wrote last time: creative work is RGB work. Ages ago I made a solutions model how GIMP could still support producing indexed images. This means doing the creative work in RGB, here shown at 200%:
When it is time to prepare an indexed version, a projection screen can be pulled over the image window that shows how the user‐controlled indexed set‑up works out, in this case a modest 16 colors:
The core of the solution model is that this projection is again a surface, that can be worked on, to make the corrections that are specific to this indexed set‑up. The non‑destructive nature of GEGL makes it possible to reapply these corrections after more creative development, or to adjust them at a later stage.
It is from the projection that an export to indexed file formats is performed.
a coin drops
Cut to the chase: it was while reading the GIMP review on ars technica by Dave Girard, where he used ‘vinyl’ and ‘audio masters’ to describe CMYK and RGB. Suddenly I could see the parallels with the indexed situation.
going to press
Here is my solutions model for preparing artwork for the printing press in GIMP.
By now it should come as no surprise that all creative work is going to be in RGB. This has also the benefit that at all times all GIMP plugins work, without a chance of color shifting conversions. Here is a schematic representation of creative work on a jazz poster, built out of four layers:
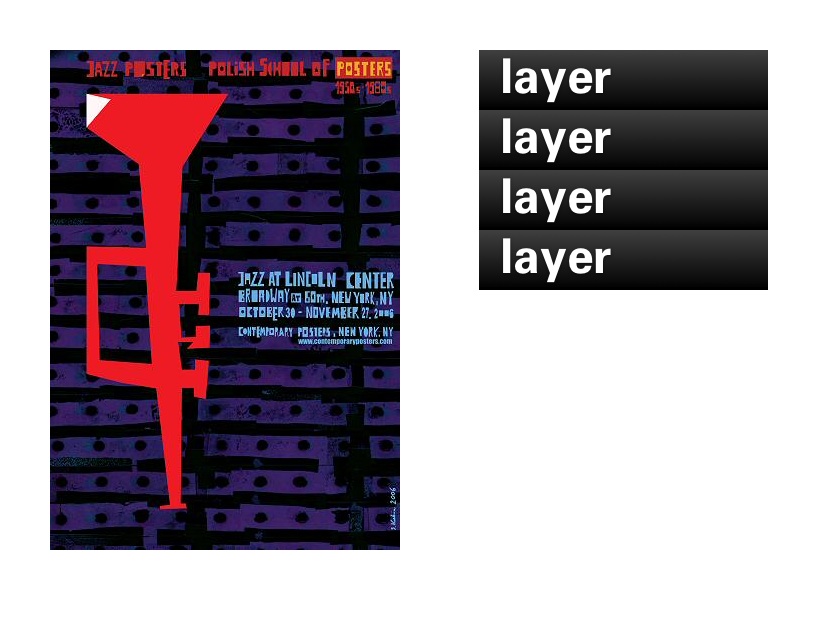 jazz posters, found at:
polish jazz art in nyc
jazz posters, found at:
polish jazz art in nyc
At any stage during the project, when there is a need to work towards the printing presses, a press projection can be pulled over the image window that shows how the user‐controlled plate set‑up works out, in this case a five‐plate job:
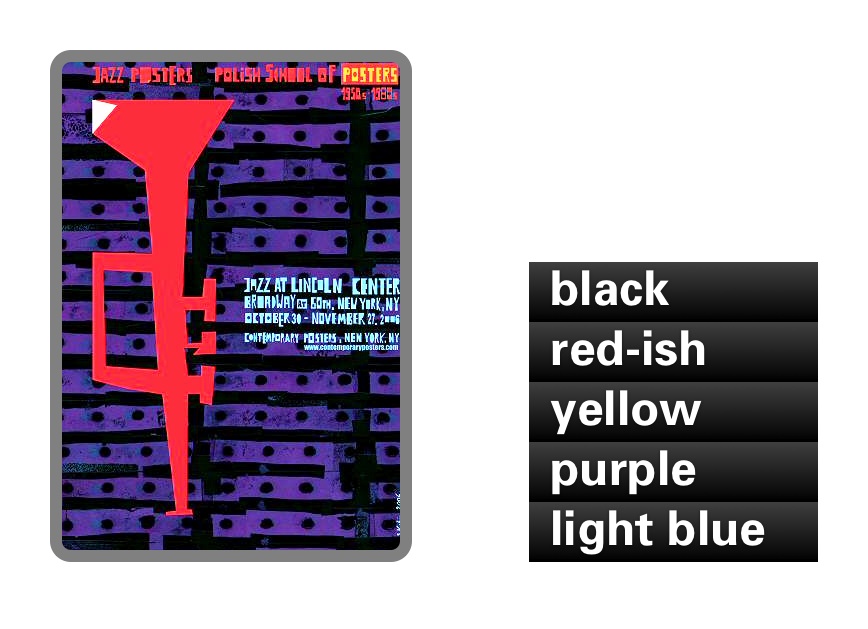
The layer stack—used in the creative development—is not used in this view. Instead what matters is the user’s plate set‑up, which is displayed and controlled as a similar stack. Each plate is fully editable: painting, curves, gradients, (lots of) plugins, anything goes. This gives us the required full control over the plates.
Note also that the colors in the press projection are already slightly different than that of the normal view, because the color profile of the printing press is taken into account.
it’s all a set‑up
Everything hinges on the particular set‑up of the press projection. This is where users freely set—as required—the number of plates and what ink/paint/lacquer is used for each plate. Any color will be possible and we can support metallic paints and matt/glossy transparent varnishes, using a bit of animation on the projection.
The set‑up is also the place where the more tricky stuff is supported: overprint and trapping, rich blacks, combined ink limits: it is probably only the beginning of how advanced this has to get. I had not forgotten about this.
CMYK + spot
In general the plate separation is calculated from the composite image that feeds into the press projection. However there will be full flexibility to map the content of any layer directly to any plate. For instance that light blue text in our example: it can be directly mapped from its text layer to the light blue plate, bypassing the composite.
Here is also the one and only time that CMYK will play a role in GIMP: as a small configuration file that is a default (OK, the default) for the projection set‑up. Nothing more, nothing less.
agile development
Since the press projection can be freely pulled over the image window and then flipped up again, GIMP will be able to fully support the required creative workflow. The mosaic below shows GIMP tracking in 16 steps real‐life work on either the creative concept or on the printing plates:
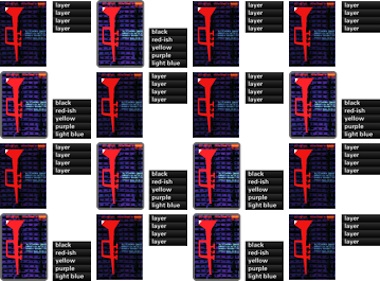
The non‑destructive nature of GEGL makes that whenever the press projection is pulled down, the updated artwork is re‑separated and all previously made plate optimisations are re‑applied on top. When the underlying artwork changes significantly, then every existing plate optimisation step can be validated by users and where needed adjusted.
The result is maximum creative flexibility and minimal rework of the plates over the life‐cycle of the file. Ah yeah, of course the whole press projection will be saved in the GIMP file. At the end, it is from the press projection that an export is performed to the file formats appropriate for shipping to the printers’.
what about CMYK files?
When a received CMYK file is to be used in new creative work, we already saw that ‘it needs to be imported and converted to RGB.’
When further fine‐tuning for the printing press is the goal, then the solution is to shove the CMYK file straight into a press projection, as a static, pre-defined separation. Each plate is then still fully editable as outlined before.
the non‑issue
That concludes my current take on ‘not quite the CMYK’ issue: bringing artwork to printing presses. Actually at LGM it turned out to be a hot topic in quite a few talks held by several projects. My contribution of squaring this circle fell neatly into place there.
Stay tuned for the last part of my LGM talk: a single‐window interface for GIMP.
Labels: design stage, GIMP, GIMP redux, lecture, practical

![]()
![]()
6 comments · post a comment
- at 20 June, 2009 00:58,
 Dread Knight commented
 - I really look forward to a single window interface.
But in the same time, this will upset some of the users.
Blender on the other hand, is going to do things the 'right' way allowing users to easily create multiple windows on the fly. - at 25 June, 2009 16:22,
 commented
 - Loosing the indexed mode is a error.
Indexed mode images are still being used on web. Their filesize are smaller than 32 bpp graphics in images with few colours and help to keep the upload traffic low.
There are lots of pixel art lowers that want support for work with indexed images.
Also, there are some games based on pixel art work that uses this type of color. A example is OpenTTD/TTDPatch. These games are based on the original Transport Tycoon Deluxe, and You need the original graphics to play them (these graphics are copyrighted and people can't download them). There was proposed a replacement of the original graphics (8 bpp indexed) based on free 32 bpp images (RGBA) made with 3D software and GIMP (or Adobe Photoshop), but It was not successful (there are a few graphics replaced), because people still want 8 bpp palette graphics. And the replacement of original graphics is in 8 bpp. The quality of 8 bpp graphics is lower than 32 bpp, but... ¡There are more creativity work! And most of new addons developed for these games are developed in 8 bpp graphics. I know other similar cases in other projects of free software games.
Also, a export of the work is not a valid solution in the last case (developing games in 8 bpp). I have learn that if You want draw a 8 bpp indexed image, You should start with a 8 bpp image.
A idea could be leave a package in the repositories with the last release of GIMP with indexed color images support called "gimp-indexed" or something similar. This is because there are people that needs work (not export) in indexed mode.
Removing the indexed work support without giving a valid alternative would be a bad thing for some open source games. - at 25 June, 2009 18:50, commented
- > Removing the indexed work support without giving a valid alternative would be a bad thing for some open source games.
Your not getting it.
You don't do creative work in Indexed mode.
GEGL can enable features like filter layers. These can be used to create layers that update the way a image looks real time, but do it in a lossy way.
When you convert a image from RGB to any other format, including index, your losing information. In order to recover that information in Gimp currently you have to undo your work.
With GEGL on Gimp they are setting it up so that you can edit and view a image as it would appear as if it was indexed, but without destroying information.
Same thing with CYMK. You will be able to see a image and edit how it looks in CYMK without actually having to convert it to CYMK. You just pull over the Convert-to-CYMK layer on top of your program and see how it works.
That way you can edit and get things done without sacrificing accuracy or flexibility. - at 07 July, 2009 11:43, commented
- OFF TOPIC
I have a blog request, would you be able to write a blog outlining all(/ some of) the successess of the GIMP UI project to date? - at 07 July, 2009 12:00, Unknown commented
- cool request, I have put it on my list of topics—there is a backlog, however. —ps
- at 08 February, 2012 10:11, commented
- regarding anonymous' comment (the one before me): What you're really saying is this: "loads of people are doing something in the wrong way, they are not using their tools right and the software they write to make use of what they produce with those tools are not using the product right -- therfor a broken feature must be maintained forever".
If you like to ask Peter one burning question and talk about it for ten minutes, then check out his available officehours.
 Peter Sikking is an
experienced
Peter Sikking is an
experienced
interaction architect. He unabashedly puts
shipping great products at the centre of his design practice. He is known for
his work for Google, Nokia, the
Metapolator &
GIMP
open source projects,
and startups.
What is Peter up to? See his /now page.
- info@mmiworks.net
- +49 (0)30 345 06 197
- imprint